How to use Multi Currency
Introduction
The Multi Currency add-on feature enables the user to enter and handle foreign currency transactions.
Video
Please click here to see the video on how to use Multi currency in Business Accountz.
Setting Business Accountz up for Multi currency
N.B. For new users, the Views described below already exist in the software with the prefix ‘Currency’, e.g. ‘Currency Sales’. Therefore, please click here to skip this step.
In order to use Multi currency, you will first need to manually activate a number of columns in your transaction tables.
You will need to do this for both your Sales Transactions and Purchase Transactions components.
The most practical way to achieve this is to create a new View for both components, one called ‘Foreign Sales’ for the former, and one called ‘Foreign Purchases’ for the latter.
The following instructions describe how to achieve this for the Sales Transactions component:
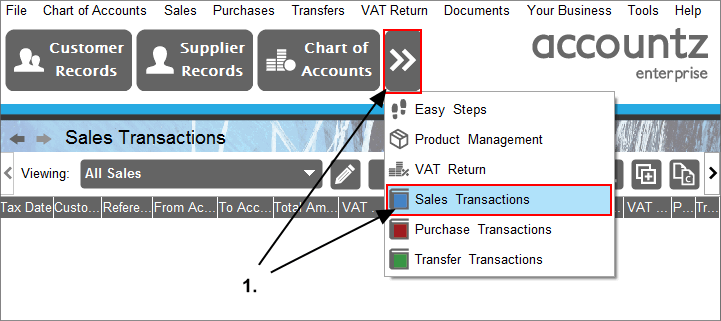
- Access the Sales Transactions tab by clicking the Sales Transactions icon (you may need to click the right arrow to reveal this icon), or Via Sales>Sales Transactions in the main menu.
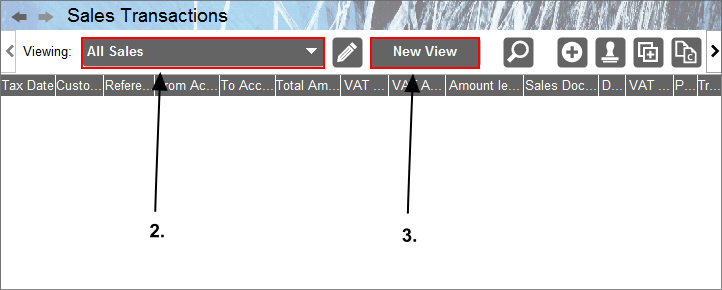
- Make sure the ‘All Sales’ view is selected.
- Click the New View icon. This will create a new view based on the existing one.
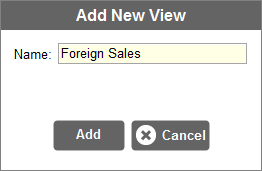
- In the ensuing pop-up box, change the View Name to ‘Foreign Sales’. Click ‘Add’ to continue.

- Select the ‘View’ Tab
- Click the ‘Columns Displayed: Show/Hide Cols’ button. Here we will amend the visible columns to add our new ones.
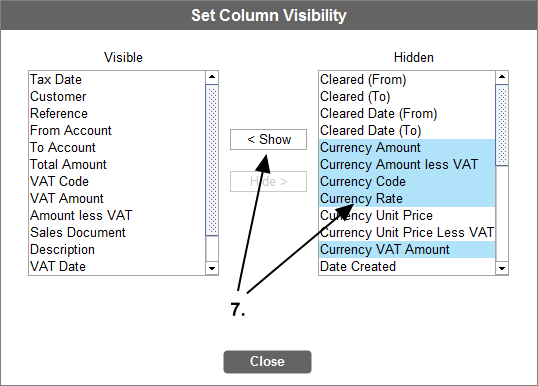
- From the ‘Hidden’ column, Ctrl+click to select the following columns, then click ‘Show’:
- Currency Code
- Currency Rate
- Currency Amount
- Currency Amount Less VAT
- Currency VAT Amount
Once finished, click ‘Close’.
Next we will need to order the columns in the table correctly.
Columns can be moved and their order rearranged by simply dragging the column header left or right as desired.
I suggest you order the columns (left to right) accordingly:
- Tax Date
- From Account
- To Account
- VAT Code
- Currency Code
- Currency Rate
- Currency Amount
- Total Amount
- Currency VAT Amount
- Currency Amount Less VAT
- VAT Amount
- Amount Less VAT
Of these, the most vital to observe is that you have Currency Code near the left side of the screen as you will need to fill this in before you can enter data into either the Currency Rate and Currency Amount fields.
Once complete, click the View icon again to close the View Editor screen. Your columns should look something like this:

Repeat the process for your Purchase Transactions component.
Entering Multi Currency Transactions
As per normal transactions in Business Accountz, foreign sales transactions are entered in the Sales Transactions component (using the view created above), and foreign purchases in the Purchase Transactions component.
The logic for entering transactions is largely the same as for normal transactions with the exception that you will also need to complete the Currency Code, Currency Rate and Currency Amount fields. There are a couple of points worth mentioning at this stage:
Firstly, as mentioned above, it is necessary to enter the Currency Code before you can enter data into the Currency Rate and Currency Amount fields.
Secondly, the order that you enter the transaction’s numerical data affects how the software calculates the rest of the data.
So, if you enter the Currency Total Amount first, then the Currency Rate, it will work out the Total Amount for you.
If you enter the Total Amount first, then the Currency Rate, it will work out the Currency Amount.
Finally, if you enter the Currency Amount first, then the Total Amount, it will work out the Currency Rate.
N.B. If you enter the transaction, and you don’t know the exact exchange rate, you may need to edit the rate once you receive your bank statement (or alternatively, wait until you receive your statement before entering the transaction).
Sample Purchase Transaction
In this example we will enter a foreign purchase transaction in the Purchase Transactions component (Payments>Purchase Transactions). Please make sure that the Foreign Purchases View that we created above is selected.
We will imagine we have purchased an item for 200 Euros with an exchange rate of 1.12 (please note that the Currency Rate reflects the number of foreign currency units to the base currency, so in this case 1.12 Euros to the Pound).

In the example above, we have entered the critical data in the following order: Currency Code, Currency Rate, Currency Amount. Subsequently the Total Amount in the base currency is calculated automatically.
Sample Sales Transaction
In this example we will enter a foreign sales transaction in the Sales Transactions component (Sales>Sales Transactions). Again make sure that the Foreign Sales View is selected.
Here we will imagine we have sold something for £399.99 (in the base currency) at an exchange rate of 1.14 Euros to the Pound.

In this example, we have entered the data in the following order: Currency Code, Currency Rate, Total Amount. Subsequently the software calculates the Currency Amount automatically.
Using a Foreign Currency Bank Account
Some users may have a locally based bank account in a different currency to the software’s base currency. For example, in the UK some businesses will have a UK account that works in Euros.
If this situation applies to you, the first thing to do is create a new bank account as normal in the Chart of Accounts, calling this something representative, such as ‘Euro Bank Account’.
Next, for the purposes of reconciling, you will need to create two new Views in the Chart of Accounts for your Foreign Currency Bank Account, which we will entitle ‘Foreign Uncleared’, and ‘Foreign Cleared’.
N.B. For new users, the Views described below already exist in the software with the prefix ‘Currency’, e.g. ‘Currency Uncleared’. Therefore, please click here to skip this step.
How to Create a Foreign Uncleared View
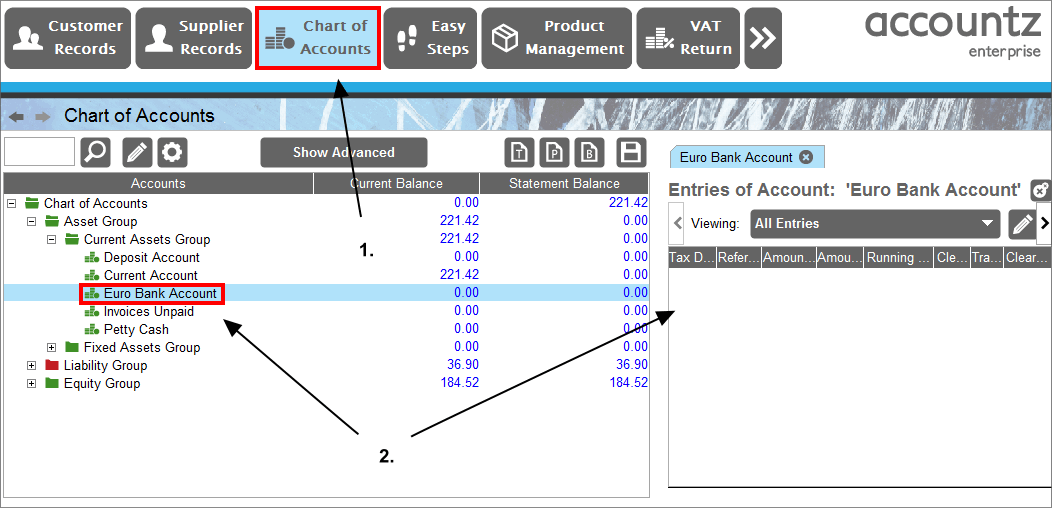
- Select the Chart of Accounts component.
- Double click on your foreign bank account in the left hand column to open its relevant window in the right half of the screen.
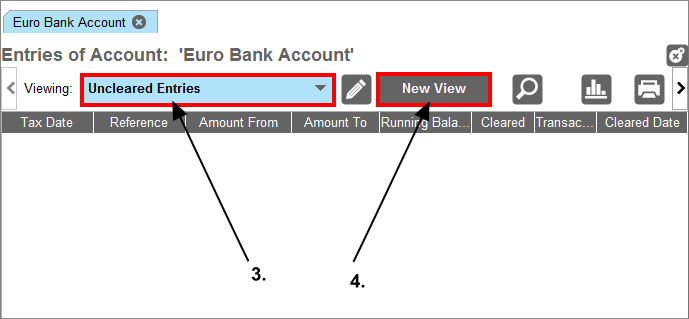
- In the right hand panel, select the ‘Uncleared Entries’ view from the drop down list. We will base our new ‘Foreign Uncleared’ view on this.
- Click the New View icon. This will create a new view based on the existing one.
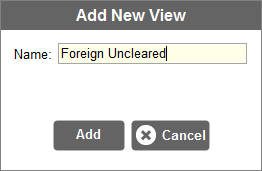
- Edit the View Name to ‘Foreign Uncleared’.

- Select the ‘View’ Tab
- Next, click ‘Show/Hide Cols’ to edit the visible columns.
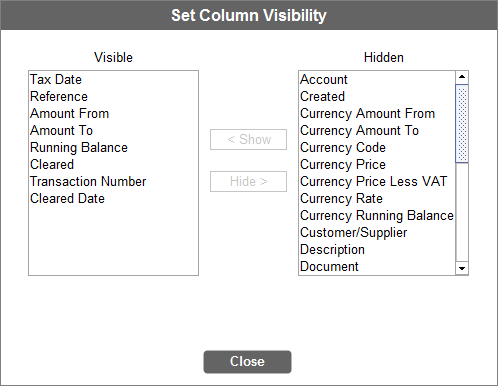
Here, we will need as a minimum to make the following columns visible (by selecting them in the ‘Hidden’ field, and clicking ‘Show’, plus removing the other visible columns (by selecting them and clicking ‘Hide’:
Required columns:
- Tax Date
- Currency Amount From
- Currency Amount To
- Reference
- Cleared
Click ‘Close’ to complete the process, and the View Editor icon to close the Editor. Your new View should look like this:

How to Create a Foreign Cleared View
The process for this is very similar to the steps described above, the differences being:
- Use the ‘Cleared Entries’ View as a basis for your new filter, and name it ‘Foreign Cleared’.
- Make sure the following columns are visible:
- Tax Date
- Currency Amount From
- Currency Amount To
- Reference
- Currency Running Balance
- Cleared
Your new view should look like this:

Entering Transactions Using a Foreign Bank Account
The process for entering transactions for such an account is the same as above, because although the account might work in Euros, your business accounts are required to be displayed in the local (i.e. base) currency.
Therefore, similar to above, a sample purchase transaction (in this case an imaginary purchase of 125 Euros) will look like this:

In this example the sequence of data entry is Currency Code, Currency Rate and Currency Total. Subsequently the Total Amount has been calculated automatically.
Please note that the Currency Rate is an estimate. This is because as the relevant bank account is effectively in the same currency as the purchase, you will never know the exact exchange rate relative to the base currency (as it won’t be stated on your statement, etc.). For such transactions we would recommend entering a default amount in the Currency Rate field.
Reconciling your Foreign Bank Account
When you come to reconcile this account against your bank statement, you will need to use your new views to ensure you are reconciling the account’s balance in the correct currency (i.e. in our example, Euros). Please follow the steps below:
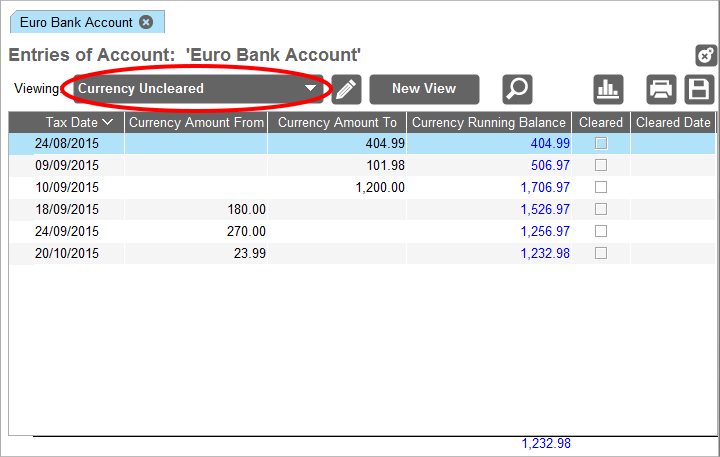
- Select the Currency Uncleared View for your foreign account in the Chart of Accounts.
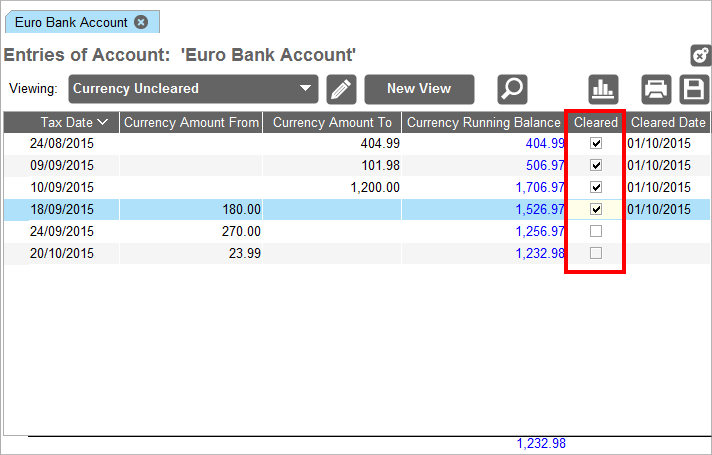
2.Tick the Cleared box for entries in the software matching those on your bank statement.
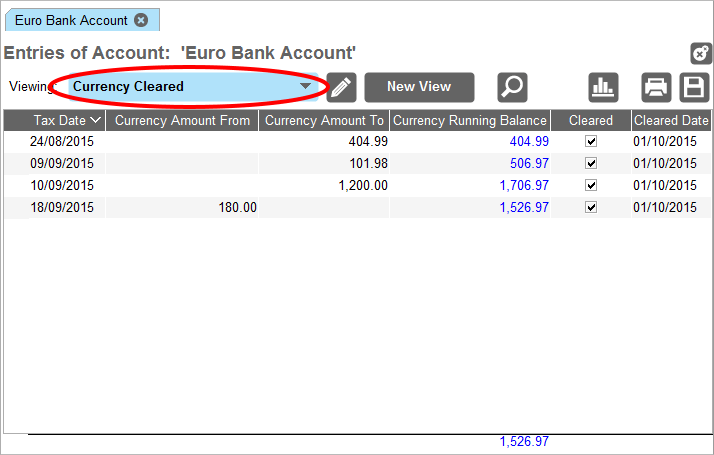
- Once you have ticked off all the entries, select the Currency Cleared View.
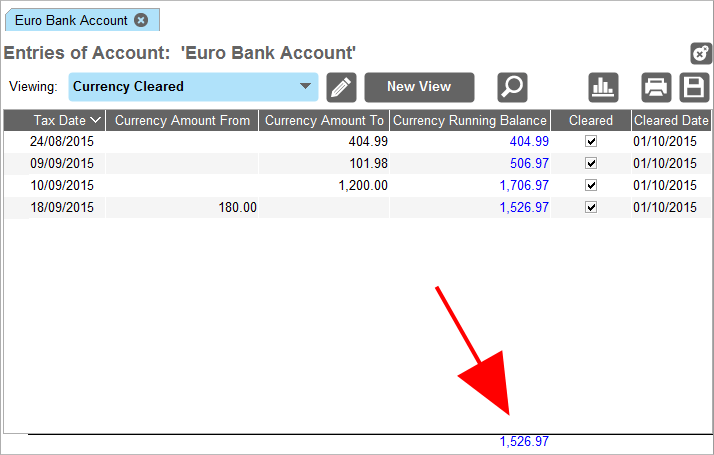
- If you have reconciled all the entries correctly, your Currency Running Balance total should match your Bank Statement.
How to transfer money from one currency bank account to another
This example assumes that one of the bank accounts is in the base currency. First, make sure that you have created your foreign currency bank account (as described above).
Create a Foreign Currency View
Next, we will need to create a new View in the Transfer Transactions component.
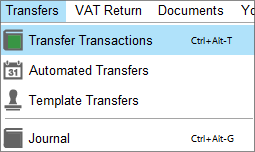
- Select Transfer>Transfer Transactions from the main menu.

- Select the View entitled ‘All Transfers’ from the drop down list.
- Click the New View button. This will create a new view based on the existing one.
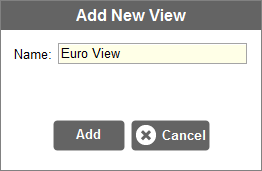
- Rename the view ‘Euro View’. Click ‘Add’ to continue.

- Select the ‘View’ Tab
- Next, click ‘Show/Hide Cols’ to edit the visible columns.
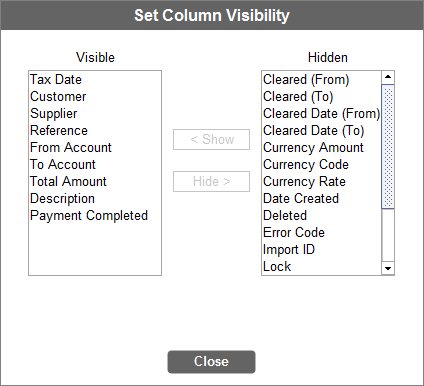
- Within the Column Visibility box, adjust the columns so that as a minimum the following are visible:
- Tax Date
- From Account
- To Account
- Currency Code
- Total Amount
- Currency Rate
- Currency Amount
- Click Close, and then click on the Views icon to close the View editor.
Transaction Examples
In order to enter the following transactions you will need to know at least two of the following three values for each transaction (the software will automatically calculate the third value):
- Total Amount
- Currency Rate (in both cases described below this will be the exchange rate relative to 1 unit of base currency)
- Currency Amount

This example describes transferring £200 from your base currency account ‘Current Account’ to your foreign account ‘Euro Bank Account’ with an exchange rate of 1.16 Euros to the Pound.

This example describes how to transfer 300 Euros from your foreign account ‘Euro Bank Account’ into the base currency account ‘Current Account’, again with an exchange rate of 1.16 Euros to the Pound.
