Add a new customer
Please note that this process is also covered by the Easy Steps component.
Overview
There are 3 ways to add a new customer in Business Accountz:
- Via the Customer column in a transaction table
- Via the Customer Records component
- Via the Customer Table component
Add a new customer to a transaction table
It is possible to add a customer to any transaction table which contains the ‘Customer’ column.
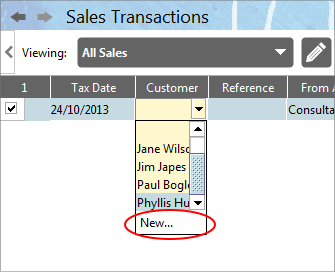
First, click in the ‘Customer’ field of any transaction.

Next, click ‘New’ from the drop down list which appears.

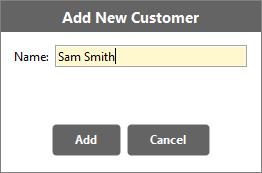
Enter the customer’s name in the ‘Add New Customer’ field, and click ‘Add’ to finish.

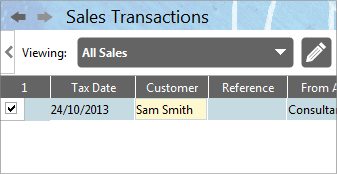
The customer’s name is associated with this transaction, and added to the Customer Records and Customer Table component

Add a customer to the Customer Records component

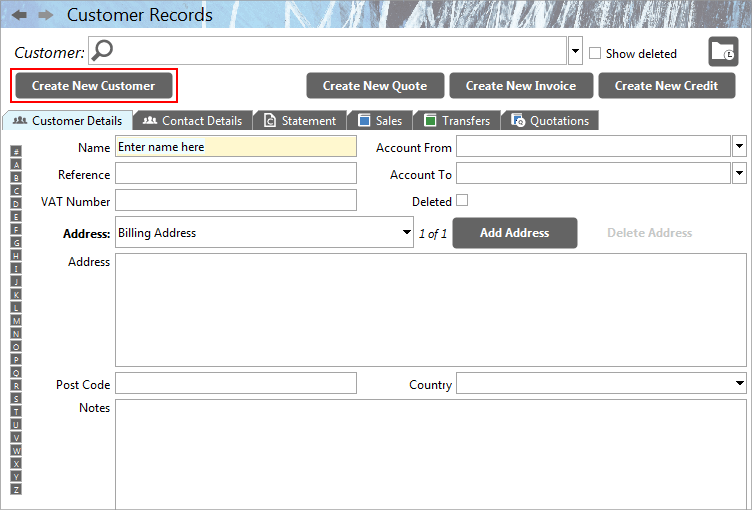
 To create a new customer within the Customer Records window, click the ‘Create a New Customer’ button at the top of the Customer Details panel.
This will clear the customer name/address fields and place the cursor in the ‘Name’ field, ready for you to start typing. Enter information as required into the following fields:
- Name - The Customer’s Name
- Address - The Customer’s Address
- Postcode - The Customer’s Postcode
- Country - The Customer’s Country of address
- Notes - Any further notes you may wish to add about the customer
- Reference - Use this for any further reference details about the customer
- VAT Number - The Customer’s VAT Number
- Account From - An account entered here will automatically be entered in any transaction/quotation for this customer within this component
- Account To - An account entered here will automatically be entered in any transaction/quotation for this customer within this component
Please note that the new customer details are automatically saved.
Add a customer in the Customer Table component

 Click the ‘Add a New Customer’ button in the toolbar at the top of the Customer Table window.
This will add a new line to the table. Enter your customer’s details as required.
Please note: the new customer data is automatically saved.
