Creating Automated Entries
Please note that this process is also covered by the Easy Steps component.
Automated Transactions are most useful for managing regular payments that you make e.g. Direct Debits etc.
Step 1:
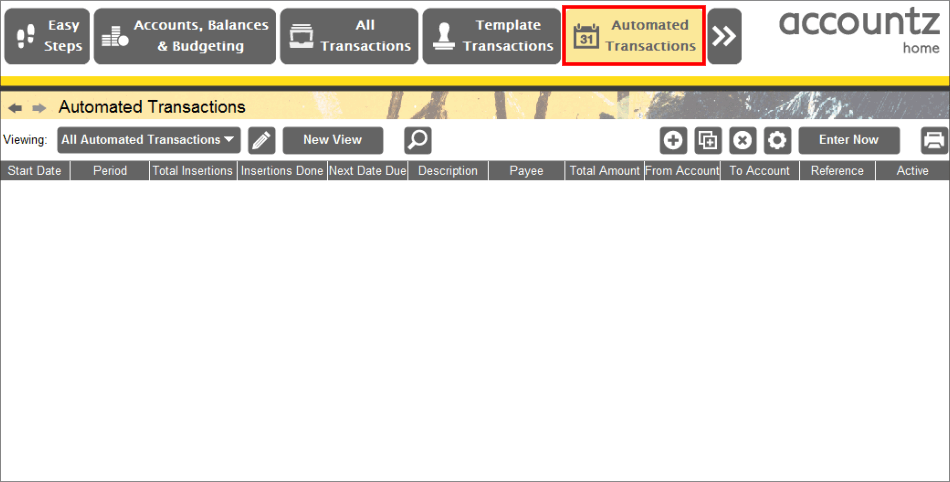
Click the Automated Transactions Icon as shown below.
Step 2:
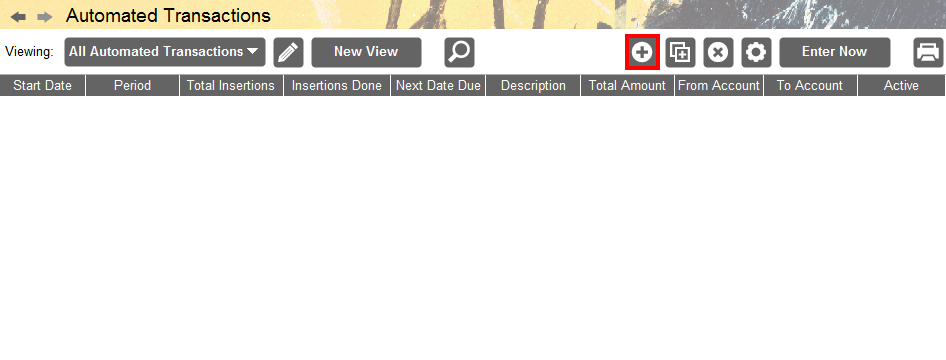
To add an automated transaction, click on the plus icon as shown below.
Step 3:
You can now add the details of the automated transaction.
Example 1:
An Expense template for a Direct Debit for Car Insurance is created. The direct debits are to run for a period of 12 months. The payment is debited from My Bank Account and is then allocated to Car Insurance in my Expenses/Motor Group.

Example 2:
A template for a Bank To Bank Transfer is created (please see example 1 above for additional/important info).

Example 3:
An Income Template is created (please see example 1 above for additional/important info)..

Transaction Error
 Until certain, necessary fields have been completed within a transaction line, the transaction will display an exclamation mark at the start of the row, and the transaction value / running balance value will appear as struck through.
Viewing Deleted Automated Transactions
In order to view any deleted automated transactions in this component, first you will need to create a Deleted transactions view.
To do this please follow these steps:
- Make sure the ‘All Automated Transactions’ view is selected, then click the ‘New View’ button.

Accounting Software screenshot auto transactions created deleted view
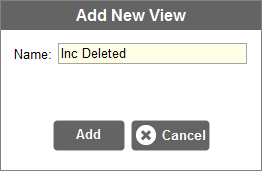
- In the pop-up window which appears, name your new view appropriately, and click ‘Add’.
Accounting Software screenshot auto transactions created deleted view 2
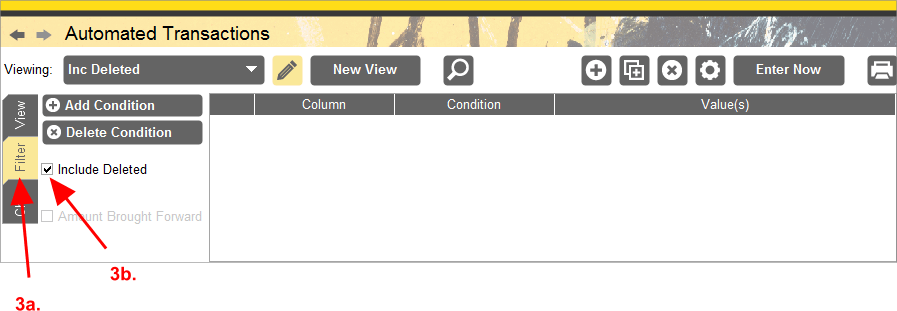
- Make sure the ‘Filter’ tab is selected (3a.), then tick the ‘Include Deleted’ checkbox (3b.).
Accounting Software screenshot auto transactions created deleted view 3
- Next, click the ‘View’ tab (4a.) and then click ‘Show/Hide Cols’ (4b.).
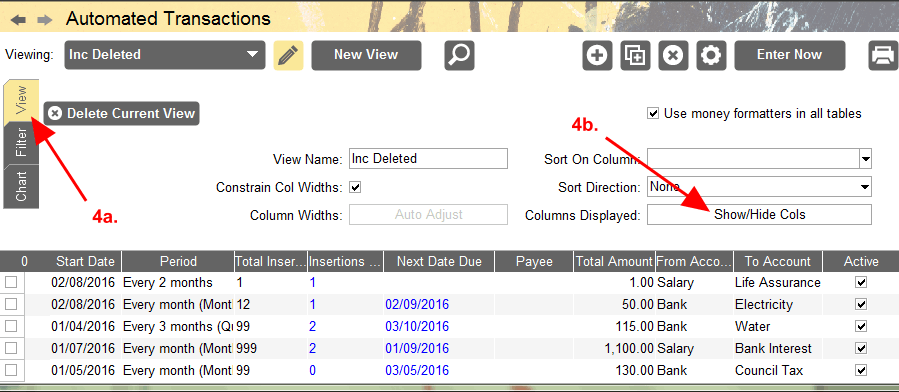
Accounting Software screenshot auto transactions created deleted view 4
- In the pop-up box which appears, click ‘Deleted’ in the right hand column to select it (5a.), click ‘Show’ to move it to the left hand column (5b.), then click ‘Close’ (5c.).
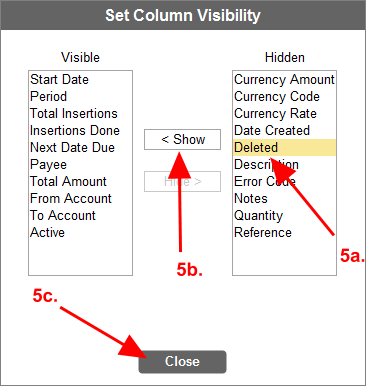
Accounting Software screenshot auto transactions created deleted view 5
- Click the Pencil icon to close the View Editor.
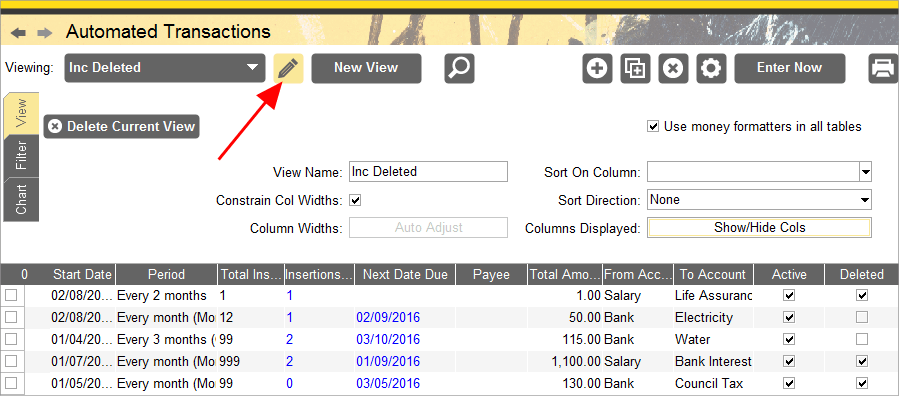
Accounting Software screenshot auto transactions created deleted view 6
- You should now see your newly created view displaying all automated transactions (including deleted).

Accounting Software screenshot auto transactions created deleted view 7
Editing Automated Transactions
If you find that you need to edit an automated transaction which has already entered one or more transactions into the software, we recommend that you copy the existing transaction and edit the copy. This then replaces the existing automated transaction which can be deleted.
The reason for doing this is that trying to edit the existing automated transaction can be problematic, particularly regarding ensuring that the ‘Next Date Due’, ‘Total Insertions’ and ‘Insertions Done’ values are correct.
Please follow these steps for a guided example:
- In this example we will imagine that the first (highlighted) transaction in the table has been entered twice by mistake (by virtue of accidentally clicking the ‘Enter Now’ button when the transaction had already been entered). Therefore, we will need to fix the transaction so that the ‘Next Date Due’ value is ‘02/09/2016’ and the ‘Total Insertions’ value correctly matches our situation.

Accounting Software screenshot edit auto transaction 1
- To do this, select the transaction in the table (2a.) by clicking it (the line will turn yellow as in the example), and then click the ‘Copy Transaction’ button (2b.).

Accounting Software screenshot edit auto transaction 2
- This enters a copy of the transaction into the table. Set the ‘Start Date’ value for this new transaction (see 3a.) to our desired date (02/09/2016), and the ‘Total Insertions’ value to reflect the actual number of insertions (11) we should have left (see 3b.).
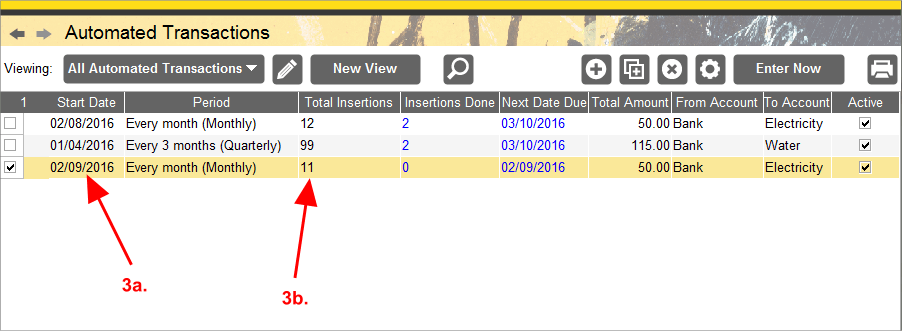
Accounting Software screenshot edit auto transaction 3
- Finally, select our original, erroneous transaction in the table (4a.) and click the ‘Delete selected transaction(s)’ button to delete it.

Accounting Software screenshot edit auto transaction 4
- Our automated transactions should now display the correct values.

Accounting Software screenshot edit auto transaction 5
