Creating a Continuation File
Continuation Files
If you wish to create a continuation file (i.e., a file based on your current datafile comprising transactions for a certain date range only), there are two options:
- File>Continuation File (from the main menu)
- Easy Steps >Set Up>Continuation File
The process as detailed below is the same regardless of which of the above options you select.
Please note, if you wish to use the Actuals dashlet’s yearly comparison feature within the Dashboard component, creating a continuation file will limit this function to the date range set in the new file.
Name your Continuation File
Accounting Software screenshot continuation file 1
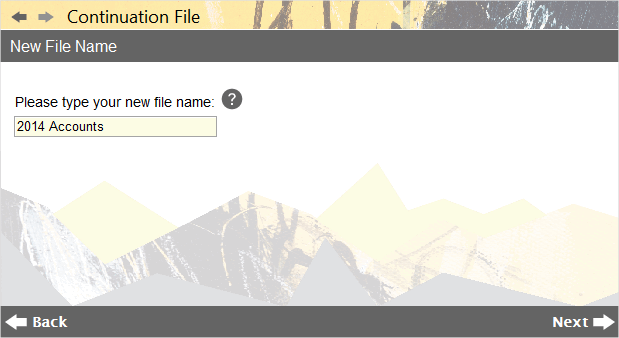
Firstly, select the name of your continuation file. We recommend you name it something which reflects the date range of the data. In the example below we will create a file for 2014 entries only, and hence name it ‘2014 Accounts’.
Press Next to continue.
Select the Start (From) Date
Accounting Software screenshot continuation file 2
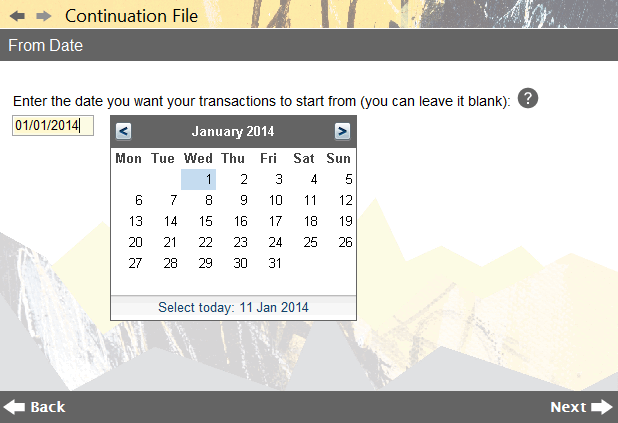
Next, select the From Date for the new file (i.e. the cut-off date from which you wish to include transactions). You can leave this blank if necessary.
Press Next to continue.
Select the End (To) Date
Accounting Software screenshot continuation file 3
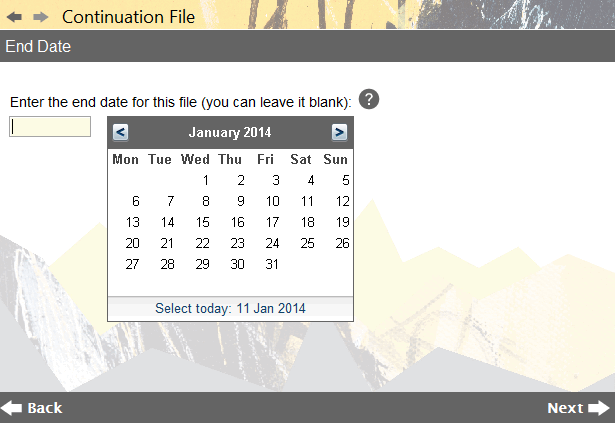
Select the To Date for the new file (i.e. the cut-off date up until which you wish to include transactions). Again you can leave this blank if necessary, which is demonstrated in the example below where we are creating a datafile for current year entries only.
Press Next to continue.
Select Opening Balances Account
Accounting Software screenshot continuation file 3a
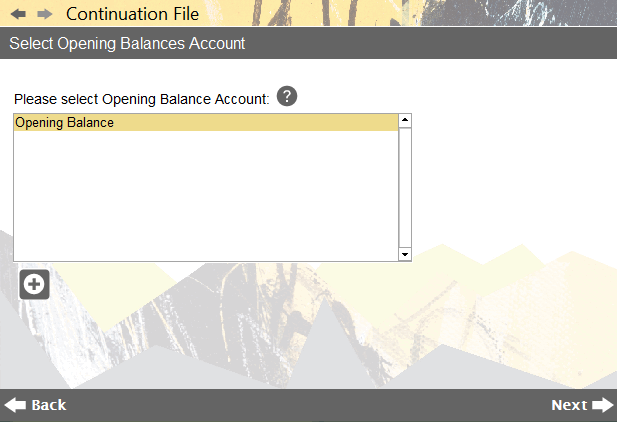
This screen prompts the user to select an Opening Balances Account.
This is the account used for the transaction(s) automatically inserted by the software to set the opening balances for your bank accounts, credit cards and loans (relative to the start date specified earlier in this wizard).
Most users can just click ‘Next’ to choose the default value (‘Opening Balance’) already selected.
Press Next to continue to the final screen of the wizard.
Confirmation
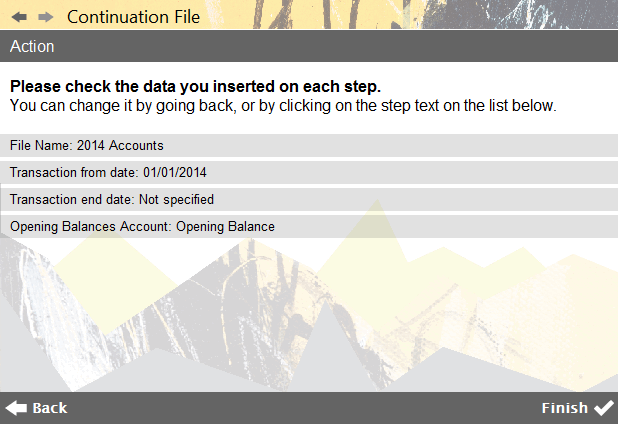
Accounting Software screenshot continuation file 4
The final screen, titled ‘Action’ is a summary screen for the file about to be created detailing the options selected in the wizard, thus far.
Press Finish to complete the process.
If you wish to open your newly created continuation file, it can be selected via the main menu option: File>History
N.B. If you create a continuation file with the intention of using it as your current datafile and leaving your existing file as an archive, it is a good idea (in the archive file) to access the Automated Transactions component and untick the ‘Active’ box to disable any automated transactions therein.
This prevents the archive file from being filled with multiple unwanted automated transactions should you wish, for any reason, to open it at a later date.
