Creating and Customising Views
In this example we will create a view which initially only shows a certain account’s entries (Bank Account). Subsequently, we will customise the view so that it only shows our Bank’s entries for the last two months.
Creating a View
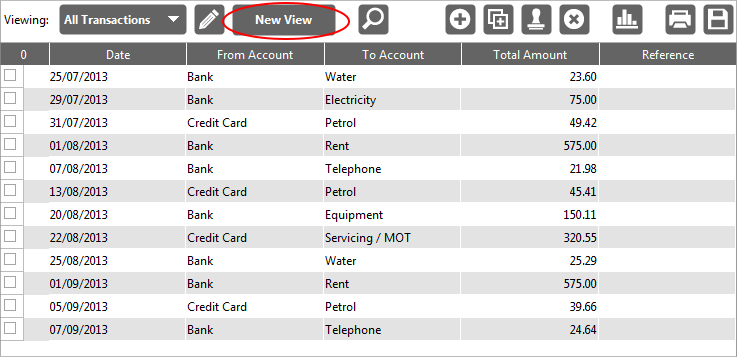
Select the New View button
Whenever you create a new view, its starting filter conditions are based on the currently select view in the drop down list. As a general rule of thumb it is a good idea to make sure that the ‘All Transactions’ view is selected from the ‘Viewing’ drop down list and work from there.
To create a new view, first select the ‘New View’ icon , visible in any transaction table.

Accounting Software views 1
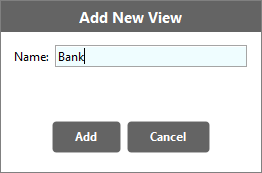
This causes a pop-up window to appear, prompting you to name your new view (the Name field will initially display the existing view upon which the new view is to be based). Re-name the view to ‘Bank Account’ and click ‘Add’ to continue.

Accounting Software create new view dialogue 2
The View Editor Panel
At this point, the View Editor Panel will open, displaying the Filter tab.
This is where we will set the view’s conditions.

Accounting Software views 4
Here, click the ‘Add Condition’ icon, and select ‘Account Involved’ from the drop-down list.

Accounting Software views 5
Click in the ‘Value(s)’ box, and start typing ‘Bank Account’. From the ensuing drop down list, select ‘Bank Account’.
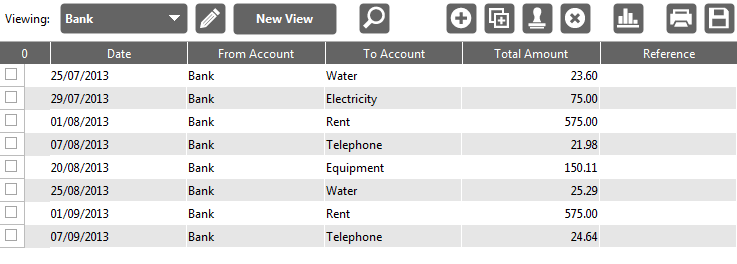
Finally, close the View Editor Panel (by clicking the pencil icon). The table will now display the filtered transactions only.

Accounting Software views 6
Customising a View
Here we will edit our newly created view to only show our Bank transactions for the last 2 months.
Rename the View
First, open the ‘View Editor’ panel. In the View tab, edit the View Name to reflect our new condition. We will name it ‘Bank Account - last 2 months’.

Accounting Software views 7
Customise the View’s conditions
Next, select the Filter tab, and click the ‘Add Condition’ icon. This will add a further condition line to the filter.
Select ‘Date’ from the drop down list.

Accounting Software views 8
In our second condition line (‘Date’), click in the ‘Condition’ field, and select ‘Occurred in the last’ from the drop-down list.
Click in the ‘Value(s)’ field, insert our required value ‘2’, and select ‘Months’ from the drop down list.

Accounting Software views 9
Click on the pencil icon to close the View Editor Panel. Our customised view now only shows the Bank’s transactions for the last two months.

Accounting Software views 10
