
Create a Report (e.g. Bank Statement) with Consolidated Balances Brought Forward
The ‘Amount Brought Forward’ feature, a recent addition to the Views sub component, enables the user to generate (and therefore print) reports from the Analysis tab within the Accounts, Balances & Budgeting component where transactions dated before a user specified date are consolidated into and represented by a single transaction line for each account involved.
This is useful if you wish to print a report of cleared entries against your bank for say the last month’s worth of entries (e.g. if you have just reconciled your bank statement), which displays the correct running balance without having to print every transaction against the account (which could translate to needing to print multiple pages of data) - see worked example below.
Worked Example
Here we will create a new ‘Cleared’ view within our Bank account’s Analysis tab within the Accounts, Balances & Budgeting component which will only display entries after a certain date (let’s say 1st Jan 2014 for this example), and where the running balance is displayed correctly.
Accounting Software screenshot create report consolidated balances 1
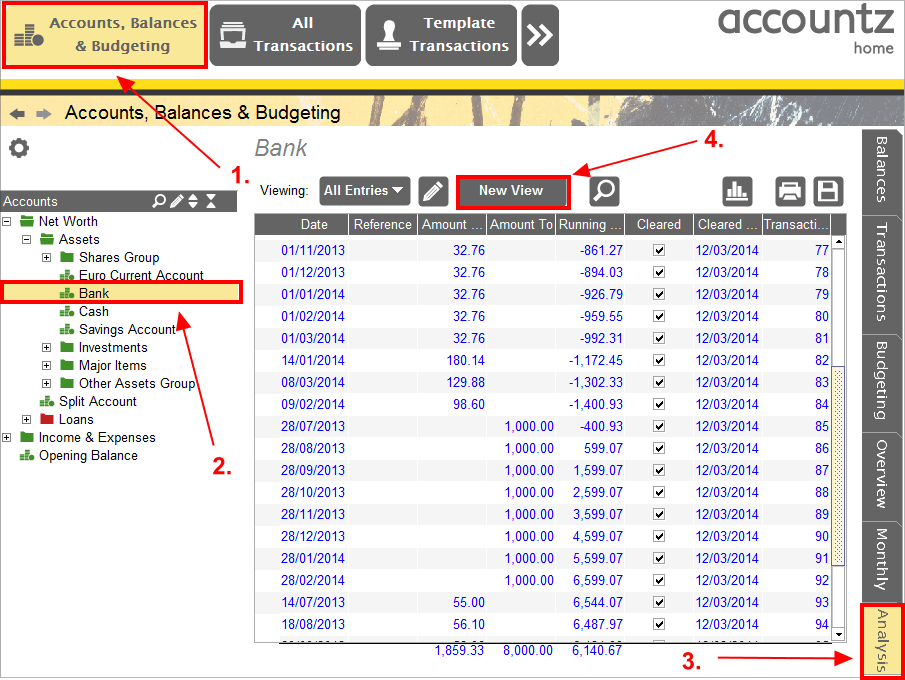
- Select the Accounts, Balances & Budgeting component.
- Select our Bank account from the left hand chart of accounts.
- Select the Analysis tab from the right hand side toolbar.
- With the ‘All Entries’ view selected, click the ‘New View’ button.
Accounting Software screenshot create report consolidated balances 2
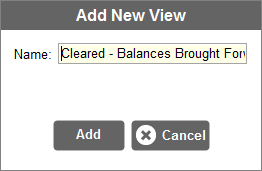
- Give our new view a name such as ’Cleared - Balances Brought Forward.
Accounting Software screenshot create report consolidated balances 3
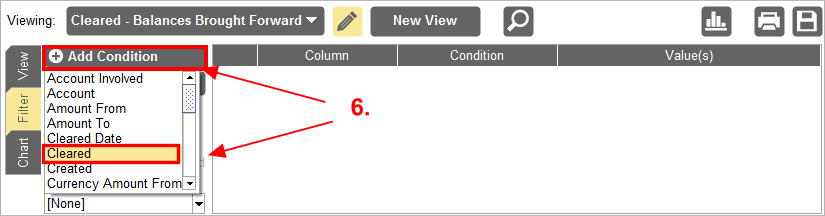
- Click the ‘Add Condition’ button and select ‘Cleared’ from the drop down list.
Accounting Software screenshot create report consolidated balances 4
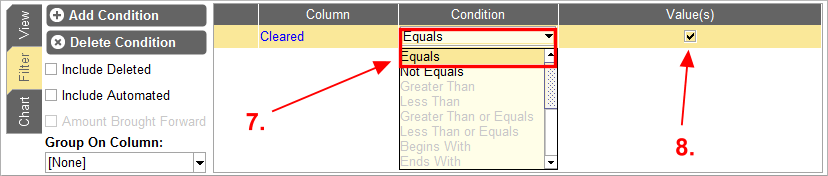
- Select ‘Equals’ from the ‘Condition’ column (by clicking in the box below it to reveal a drop down list).
- Tick the checkbox in the ‘Value(s)’ column.
Accounting Software screenshot create report consolidated balances 5
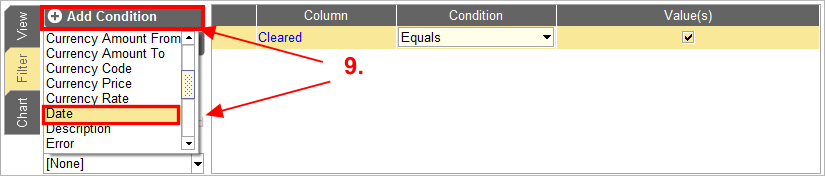
- Click the ‘Add Condition’ button again and select ‘Date’ from the drop down list.
Accounting Software screenshot create report consolidated balances 6
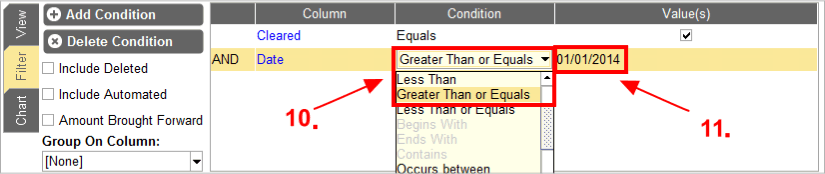
- Select ‘Greater Than or Equals’ from the ‘Condition’ column (by clicking in the box below it to reveal a drop down list).
- Edit the date in the ‘Value(s)’ column (by clicking in it) so that it reads 01/01/2014.
Accounting Software screenshot create report consolidated balances 7
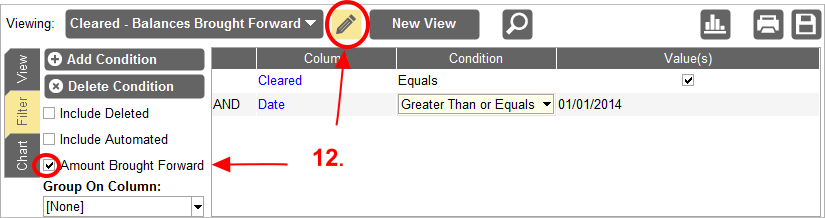
- Tick the ‘Amount Brought Forward’ checkbox, and click the Open/Close the View Editor Panel icon (pencil) to close the editor. Please note, the ‘Amount Brought Forward’ checkbox will be greyed out until a ‘Date’ Condition is added to the table as described.
Accounting Software screenshot create report consolidated balances 8
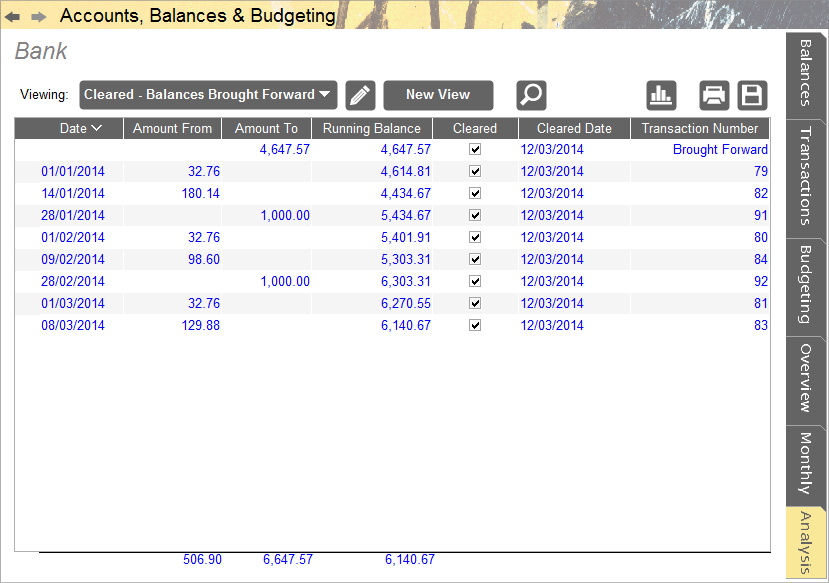
- The table will now display transactions on or after the selected date only, plus one consolidated transaction (labelled ’Brought Forward) for all transactions prior to this date to ensure the running balance remains correct.